
Outlook.com is a free email service owned by Microsoft. It features a seamlessly integrated webmail interface that allows you to send emails, organize tasks, schedule events, receive notifications, and more.
Outlook has many features and one among these is the option to create groups. The feature allows you to create a group of contacts which makes it easier for you to communicate with people. It is very useful in sending official emails and invitations to a group of people without having to worry about missing out on someone or the other.
Create a Group in Outlook.com
As noted above, creating groups is a great way to organize your contacts if you are using Outlook for professional correspondence.
Primarily Outlook has 2 versions – New Outlook and Classic Outlook. Below we have discussed the methods to create a group in both versions.
Steps to Create a Group in New Outlook
- Open your web browser and type Outlook.com in the address bar. Enter your Outlook email address and provide the password to log in to your account.
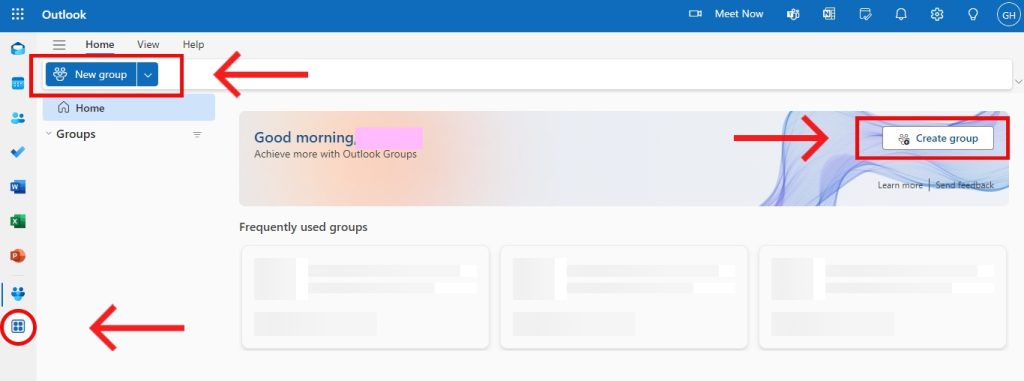
- If you do not have a Microsoft Outlook email you can use your Gmail account to sign into Outlook. After login into your account locate the Group Icon on the Navigation panel.
- Click on the Group icon to open the panel. On the top, you’ll be able to see the tab “New Group”. Select the option to create a new group.
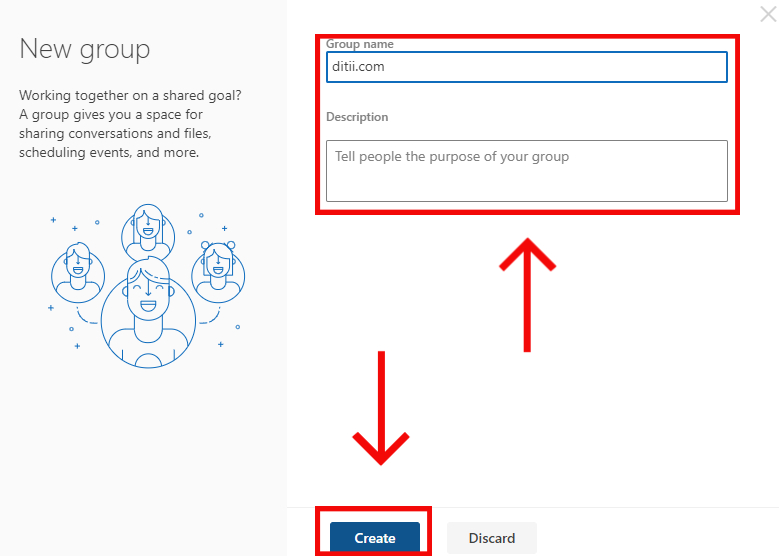
- Provide a name for the group in the given field in the window that appears. You may add a description for your new group in the Description box that appears below the name field. Select the option “Create” to complete the process.
- Now you will be able to see the newly created group displayed on the screen. Select and open it to make changes to the group. Save changes and close.
Steps to Create a Group in Classic Outlook
- Log in to your Microsoft Outlook account.
- On the Navigation Bar that is located on the left side of the interface locate the People icon. Select the icon to open all the contact details.
- On the top panel, you will be able to see the option “New Contact” accompanied by a dropdown arrow. Select the arrow to open a dropdown list.
- From the list select the option “Group” to create a new group. Enter the name of the Group and add contacts.
Creating a Contact Group in Outlook on the Web
‘Outlook on the Web’ is a web app that is a web-based version of Outlook. Here’s how you can create a group in this version.
- Login to your Outlook account. From the side panel find the People icon and select it. This gives the option to create a new contact list.
- You can add the contacts by right-clicking or selecting them from the list. Then click on ‘New Contact List’ to complete the process.
Conclusion
The Group feature in Outlook allows users to make more efficient use of this high-end email service. In newer versions of Outlook, the procedure to make groups has been simplified. Depending on the version you have you can easily create and edit the group. You can remove contacts from a group and also delete a group if not necessary.

Hello! I’m George Charles Walls, a dedicated writer at ditii.com specializing in technology and email recovery.
- With extensive knowledge in email creation and management, I provide readers with practical tips and solutions for their email-related issues.
- My aim is to make email technology accessible and straightforward for everyone, ensuring our content is both engaging and informative.
My focus on creating clear, step-by-step instructions and helps users efficiently manage their email accounts.