iCloud is Apple’s creation for cloud storage and syncing. It smoothly integrates with your Apple gadgets. It lets you securely stash photos, documents, contacts, and more in the cloud. You can access everything from any device with the internet. Here, you’ll learn how to set up your iCloud account.
Understanding iCloud
You can get iCloud, but first, know what it can do for you:
- Secure Cloud Storage: Backup photos, videos, documents, and app data. This will keep them safe.
- Device Synchronization: Sync contacts, calendars, and notes. All your Apple devices stay updated with this feature.
- Find My: Locate lost or stolen gadgets via iCloud’s Find My feature.
- Apple Pay: Store credit and debit card details. Make secure online payments through this.
- iCloud Drive: Access and share files from any device using iCloud Drive.
Creating an iCloud Account
So, you want to create an iCloud account? Here are three ways to make it happen:
On Your iPhone or iPad
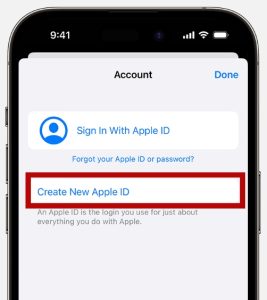
- Tap the App Store icon. It’s on your home screen. Select your profile icon at the top right. Sign in with your Apple ID or choose “Create New Apple ID.”

- Enter your details—name, email, birth date, and security questions. Agree to Apple’s terms. Create a strong password and set the device region. The email address you are providing will be your new Apple ID.
- Enter your payment method and billing details and then click on “Next”. Also, you can choose “None”. You will not be charged unless you are making a purchase.
- Confirm your phone number as it helps in verifying your identify and recover the account, if requirement. Then tap “Next”. Verify your email. Apple sends a link; click it to activate your iCloud.
On Your Mac
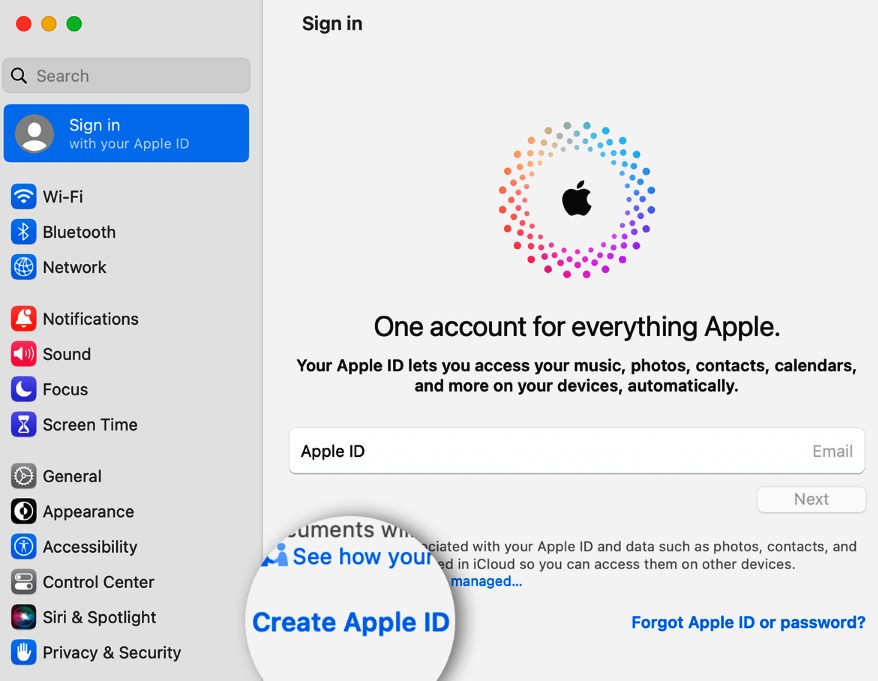
- Click the Apple menu. Select “System Setting” but in earlier versions of macOS, choose “System Preferences.”
- Choose the “Apple ID” icon. Sign in with your Apple ID or select “Create Apple ID.” Provide details—name, email, birth date, and security questions. Agree to Apple’s terms.

- Add your payment and billing info and then click “Continue”. You can also click on “None”. You will not be charged until you buy something. Verify your email. Apple sends a link; click it to activate your iCloud.
A Web Browser
- Go to iCloud.com. Click the “Create Apple ID” button. Fill in your name, email, birth date, and security questions. Agree to Apple’s terms.

- Enter the phone number that you will always have access to. Check the boxes to subscribe to “Apple Updates” if you want. This will keep you up to date on the latest software, news, etc.
- Verify your email. Apple sends a link; click it to activate your iCloud.
Securing Your iCloud Account
Secure your iCloud account like a pro by following the steps. Create a unique, strong password for your iCloud account. Enable 2FA for extra security. Change your password regularly. Be cautious with emails or messages that claim to be from Apple.
Additional Tips
Use a trustworthy email address for creating your iCloud account. Regularly back up your devices to iCloud to protect your data. Keep an eye on your storage use and upgrade if necessary.
Related articles:

Hello! I’m Victoria Morgan, a proficient writer and specialist at ditii.com. I focus on producing insightful content about technology and email recovery. With my background in email creation and management, I aim to empower users with the knowledge to handle their email platforms effectively.
My expertise in using techniques increases the reach and impact of our content, making sure our readers have access to practical advice and tips for efficient email management.
Contact me! [email protected]

